How to add a Stripe-like feedback system on your Astro website
Introduction
This is a step by step guide to integrate Feelback with your Astro website. With this guide you will add a feedback system similar to the one included in the Stripe documentation.
At the and of the page each documentation page Stripe asks for a user evaluation:

When the user clicks Yes or No a set of feedback choices will appear.
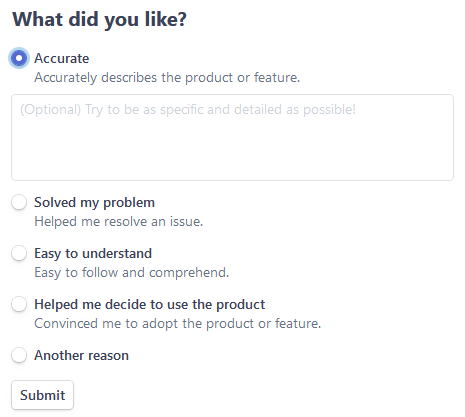
The form title and the choices are different for the Yes and the No feedback. In addition, for each choice, the user can type an optional message to further detail the feedback.
You can read a deep analysis about the Stripe documentation on the article Case study: Stripe documentation feedback system.
Guide goals
In this tutorial you will:
- identify the feedback categories, or Tags, a user can pick
- setup a Feelback project to receive TaggedMessage signals
- install the astro-feelback package into your Astro website
- add the Is this page useful? component on your Astro article footer
- (optional) customize the component style
Step 1: Identify feedback categories
The Stripe feedback system allows the user select a category for the feedback. To incorporate a similar system in your website, first of all, we need to identify all the different feedback categories the user can submit, and pick a unique name for each category.
In this guide, we’ll follow the same categories that Stripe uses.
For the positive feedback:
| category | description |
|---|---|
| accurate | Accurate |
| problem-solved | Helped solve my problem |
| clear | Easy to understand |
| product-chosen | Helped me decide to use the product |
| yes-other | Another reason |
For the negative ones:
| category | description |
|---|---|
| inaccurate | Inaccurate |
| missing-info | Couldn’t find what I was looking for |
| unclear | Hard to understand |
| bad-examples | Code samples errors |
| no-other | Another reason |
Step 2: Setup the Feelback project
If you don't have already a Feelback account, please signup and create one. It's free and doesn't require a credit card to use.
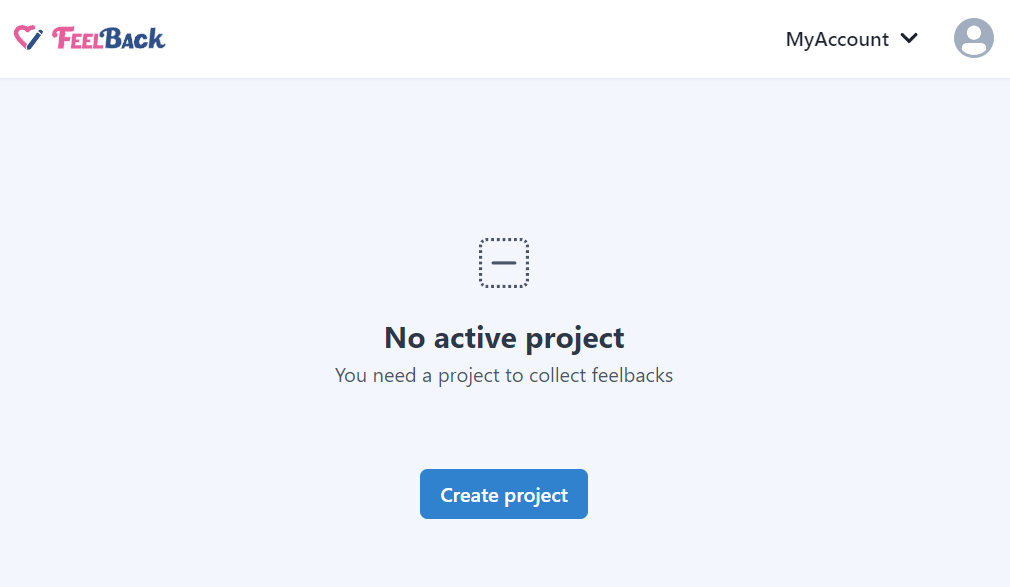
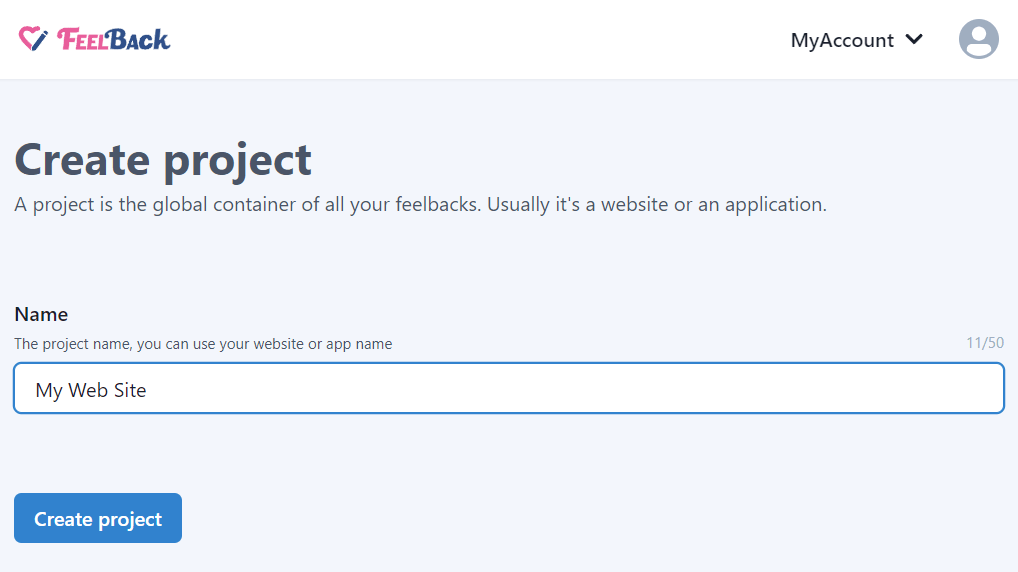
Access the Feelback panel, and create a project if you don't have any.
You can use your website name.
After that, create a ContentSet which will contain your content and feedbacks you will receive.
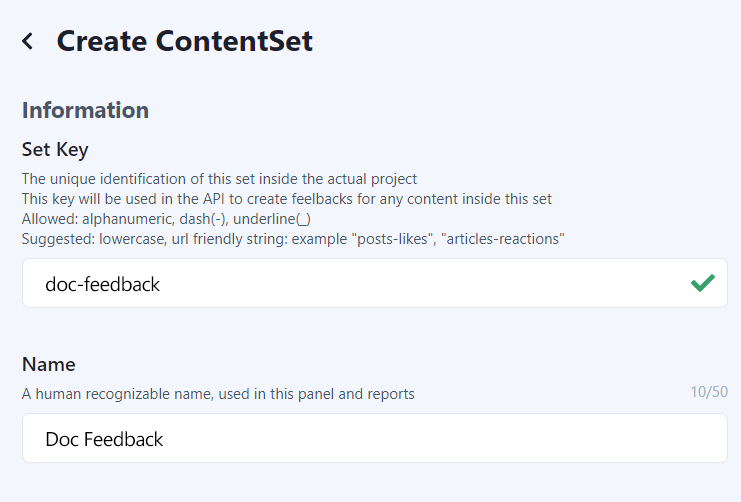
Pick the Tagged Message type to enable this content-set to receive categorized feedback message signals.
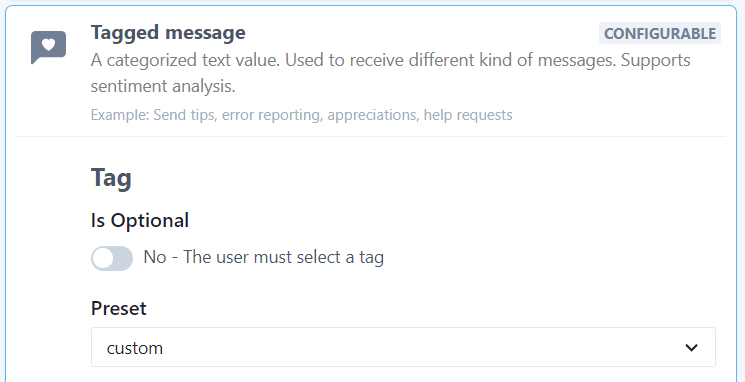
For the Tag, pick the custom preset which allows you to set custom values to model your feedbacks categories.
Turn on sentiment analysis to associate a positive or negative value to each category.

Now, you can insert the values and the relative sentiment:
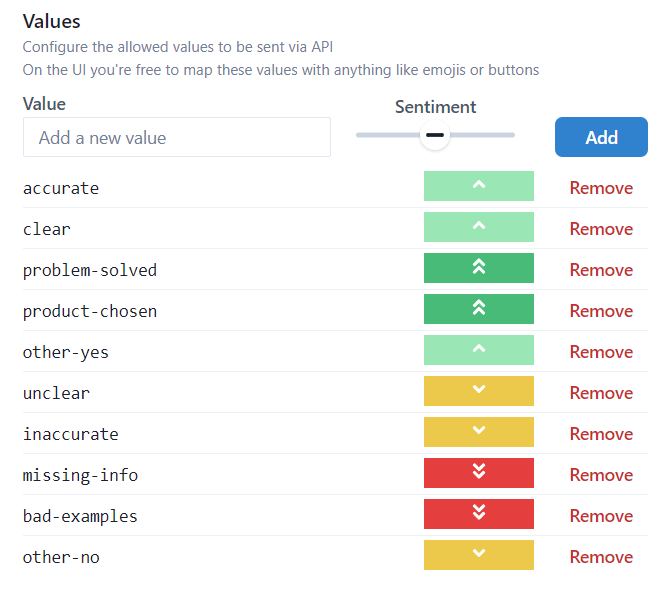
Set the Message optional, so the user not required to fill additional details.
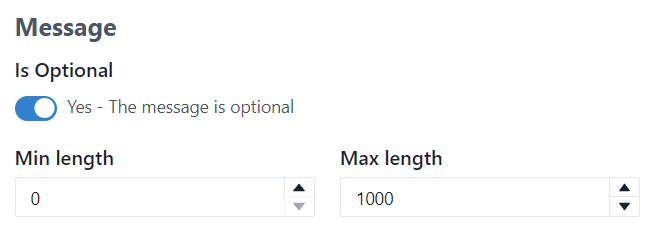
You will end up with a ContentSet like the following one:
Step 3: Install the Feelback plugin
In your Astro project directory, just install the astro-feelback package:
npm install astro-feelbackpnpm add astro-feelbackyarn add astro-feelbackStep 4: Create the Feelback component
Let’s start creating a dedicated component to encapsulate all feedback logic. Later, we can import the component in the page layout.
Let’s import the builtin component FeelbackSplitTaggedMessage which allows to display a simple question with Yes and No buttons. Let’s add also the default style provided by the package.
components/FeedbackComponent.astro
---
import FeelbackSplitTaggedMessage from "astro-feelback/components/FeelbackSplitTaggedMessage.astro";
import "@feelback/react/styles/feelback.css";


const CONTENT_SET_ID = "your-content-set-id-from-panel";
---
<FeelbackSplitTaggedMessage contentSetId={CONTENT_SET_ID} />
Now, we want to define our categories, the Tags, for both the Yes and No case. We’ll use the categories defined with the Step 1.
Let’s use the FeelbackValueDefinition type to have nice editor autocompletion.
components/FeedbackComponent.astro
---
import FeelbackSplitTaggedMessage from "astro-feelback/components/FeelbackSplitTaggedMessage.astro";
import "@feelback/react/styles/feelback.css";
import type { FeelbackValueDefinition } from "astro-feelback";


const CONTENT_SET_ID = "your-content-set-id-from-panel";

const YES_TAGS: FeelbackValueDefinition[] = [
    { value: "accurate", title: "Accurate", description: "Accurately describes the product or feature.", },
    { value: "problem-solved", title: "Solved my problem", description: "Helped me resolve an issue.", },
    { value: "clear", title: "Easy to understand", description: "Easy to follow and comprehend.", },
    { value: "product-chosen", title: "Helped me decide to use the product", description: "Convinced me to adopt the product or feature.", },
    { value: "other-yes", title: "Another reason" },
];

const NO_TAGS: FeelbackValueDefinition[] = [
    { value: "inaccurate", title: "Inaccurate", description: "Doesn't accurately describe the product or feature.", },
    { value: "missing-info", title: "Couldn't find what I was looking for", description: "Missing important information.", },
    { value: "unclear", title: "Hard to understand", description: "Too complicated or unclear.", },
    { value: "bad-examples", title: "Code samples errors", description: "One or more code samples are incorrect.", },
    { value: "other-no", title: "Another reason" },
];
---
Finally, we can assign the Tags along with nice titles for the forms for both cases. In addition, we pass the withMessage prop to show a textarea for an optional message the user can send.
components/FeedbackComponent.astro
---
// omitted
---
<FeelbackSplitTaggedMessage
    contentSetId={CONTENT_SET_ID}
    withMessage
    tags={{
        y: YES_TAGS,
        n: NO_TAGS
    }}
    titles={{
        y: "What did you like?",
        n: "What we should improve?",
    }}
/>
And, after all, here’s the final component.
components/FeedbackComponent.astro
---
import FeelbackSplitTaggedMessage from "astro-feelback/components/FeelbackSplitTaggedMessage.astro";
import "@feelback/react/styles/feelback.css";
import type { FeelbackValueDefinition } from "astro-feelback";


const CONTENT_SET_ID = "your-content-set-id-from-panel";

const YES_TAGS: FeelbackValueDefinition[] = [ /* omitted */];
const NO_TAGS: FeelbackValueDefinition[] = [ /* omitted */ ];
---

<FeelbackSplitTaggedMessage
    contentSetId={CONTENT_SET_ID}
    withMessage
    tags={{
        y: YES_TAGS,
        n: NO_TAGS
    }}
    titles={{
        y: "What did you like?",
        n: "What we should improve?",
    }}
/>
The component is just a few lines of code thanks to astro-feelback packages which includes pre-configured components ready for the most common scenarios.
Now, let’s import the component in your page layout. Let’s suppose you have a ArticleLayout component to render the article content.
ArticleLayout.astro
---
import Layout from "./BaseLayout.astro";
import FeedbackComponent from "../components/FeelbackSplitTaggedMessage.astro";
---
<Layout>
  <Content />
  <hr />
  <FeedbackComponent />
</Layout>
Step 5: Customize the style (Optional)
You can override the predefined style with additional CSS.
For example, you can add some selector to change the button icons size and set some custom value.
---
import "astro-feelback/styles/feelback.css";
---
<style is:global>
   .feelback-icon svg {
     width: 24px;
     height: 24px;
   }
</style>
Full documentation with advanced customization is available inside the Astro integration guide.
Analyze aggregated feedback data
You can access the Feelback panel and checkout your content performance. A content item is the target object of the user feedback. In this scenario, a content item is the actual page the user is browsing.
In the dashboard, you can quickly see which page performs better.
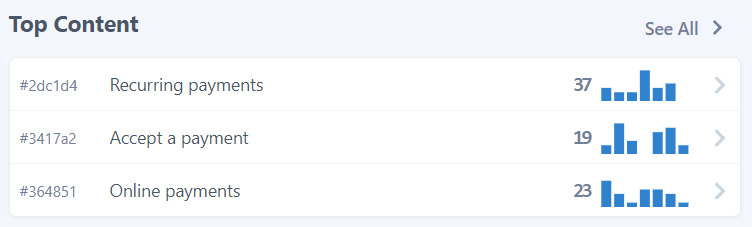
For each page you can analyze aggregated data, which include the feedback count received. You can go back and check historical data and change the aggregation period to week, month or year.
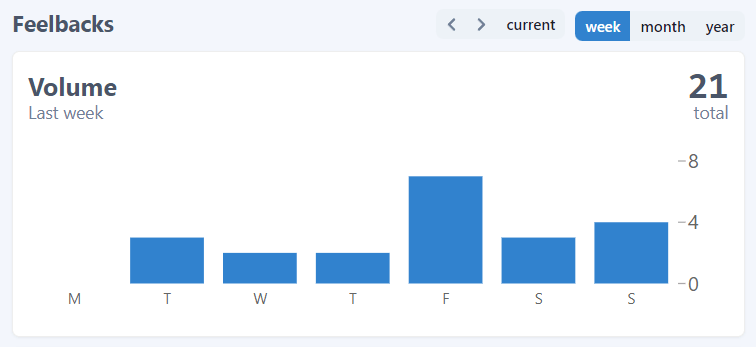
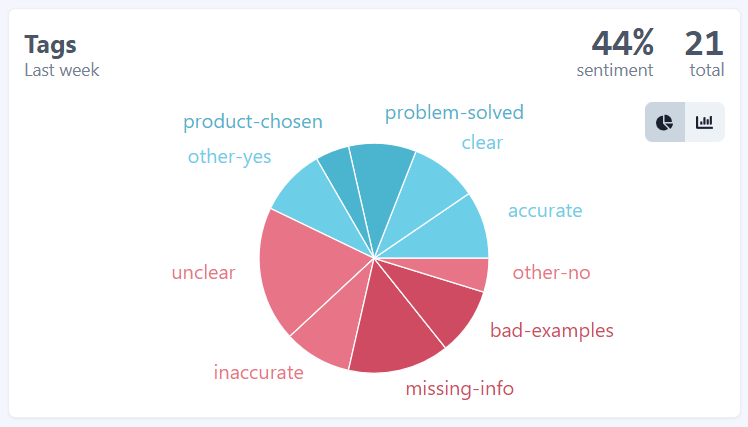
In this guide, we used the TaggedMessage to collect user feedbacks. And, because we configured sentiment values, Feelback creates sentiment aggregations too. For each page you can see the overall evaluation and the per Tag split.
In addition to the aggregated view, you can go deep and analyze each single feedback. You can search, filter and check each feedback and see the details.
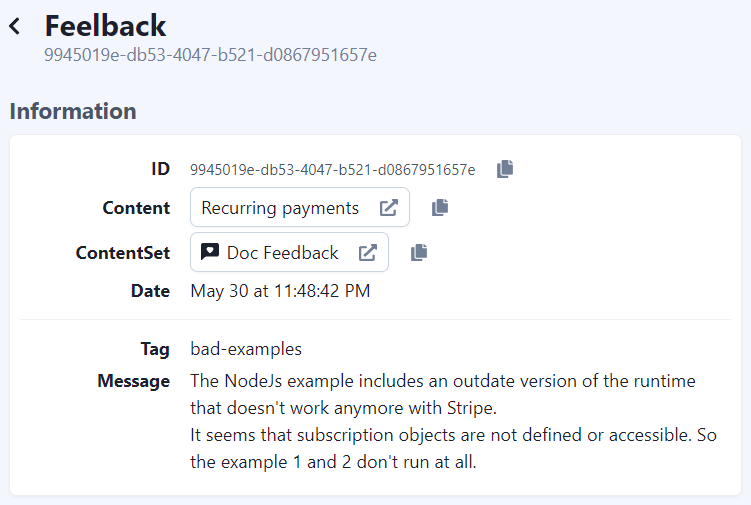
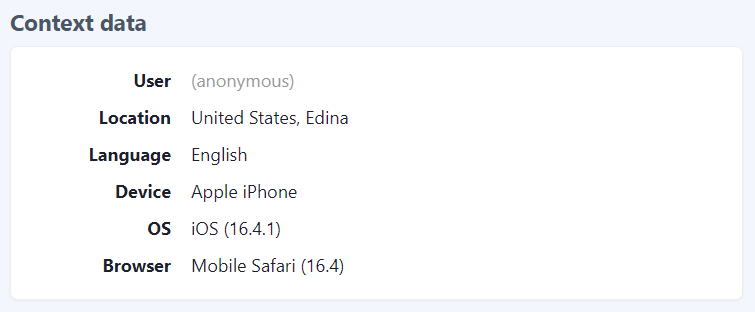
Each feedback comes with context data to further understand the relevance and specifics.
Contributing
The astro-feelback package is open source and available on github. Any contribution is much appreciated. Issues, bug reports and feature requests are welcome. Do not hesitate to reach us or ask for help.
Additional resources
Other guides for Astro
Documentation
- Read the concept guide with an overview of the Feelback service and all the features available
- Checkout the Feelback types list with all signals you can receive from your user, from simple reactions or ratings to more complex error reporting or suggestion messages